Have you bought a Canon TR4500 printer and desire to set it up fast? Canon printers are renowned worldwide for their incredible performance. Correctly setting up the printer allows users to start operating it efficiently. In this guide, you will find easy stepwise instructions for the Canon TR4500 setup. There are various methods by which you can accomplish this task. As per your requirements, you can opt for any of the ways described in this article. By properly following the instructions and steps, you’ll be able to get your printer up and running quickly.
Different Ways for Canon TR4500 Setup
As mentioned before, there’re a couple of different ways by which you can set this printer up. You can also refer to the Canon TR4500 manual, which is available online. By going through it, you can get information about all the aspects of this device.
You can either select the conventional method of setting up via the USB cable. You can also opt for the wireless option. Go through any of the methods listed below to efficiently begin the process of printing, faxing, and scanning your documents.
Setup Canon TR4500 through the USB port
Using a USB port, you can easily make Canon TR4500 connect to computer. Go through the steps below for this process.
- Navigate to the website of the manufacturer for downloading the relevant print drivers.
- After downloading, install the printer drivers on the system.
- Next, navigate to the option of ‘Devices & Printer’ on your computer.
- Now, select the name of the printer from the list.
- Choose the method of connection when it comes in the succeeding window.
- Now you can choose the option of ‘USB’ connection. Tap on ‘OK.’
- Link the USB cable to the printer for the Canon TR4500 setup.
- Switch your printer and wait for some time till it gets connected.
- When you are done, you can test the displays of the print screen. For doing it, tap on ‘Start.’
READ MORE- How to do Canon printer wireless setup with an ease?
Now you have accomplished the setup process of Canon TR4500 through a USB port. But there is a sizeable section of people who don’t possess a USB cable. If you come in this category, you can opt for the wireless option of the printer setup. The succeeding sections of this article will explain how to connect your computer to the printer wirelessly.
Setup Canon TR4500 wirelessly
For ij.start.canon TR4500 setup, you can link the printing device to your PC wirelessly. For it, you are required to select the Wi-Fi connection and run the print drivers for the setup procedure. Here is the whole procedure that you should follow for setting up the printer wirelessly.
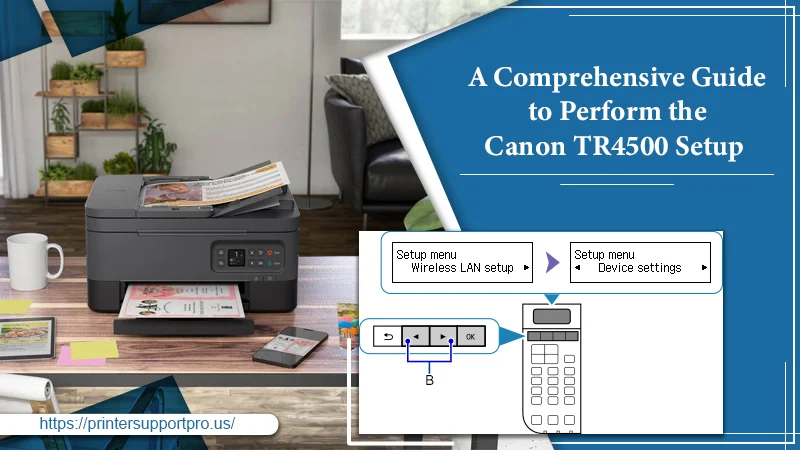
- Switch on your Canon printing device and hit the ‘Wireless’ or the ‘Menu’ Hold it for around 3 seconds.
- Check whether your Wi-Fi is enabled on the printer. Now you can go over to your PC for Canon TR4500 wireless setup.
- Download the driver files that are compatible with your printer from the website of the manufacturer. Run them on your PC.
- Next, tap ‘Next’ on the screen of ‘Start Setup.’
- Input the username and password on the screen that appears next.
- Choose the option of ‘Start Setup’ and click ‘Next.’
- Select the ‘Region’ and tap ‘Agree in the Information Request’ screen.
- Tap the option of ‘Yes’ that is present on the screen of ‘Check Connection Method.’
- When you see the popup appearing, tap ‘Allow.’
- You can now add the printer from the displayed devices list. After that, print a page for testing.
These steps will allow your Canon TR4500 connect to wifi. Thus, you can easily print, scan, and conduct other tasks.
Canon printer setup through LAN connection
You can make use of the ‘Wireless Direct’ option to enable Canon TR4500 connect to computer wirelessly. Go through the steps below for it.
- Ensure that your printer is switched on. Now click the ‘Setup’ button.
- Select the option of ‘Device Setting.’ Now choose the option of ‘LAN Settings.’
- Click the option of ‘Wireless Direct’ and tap ‘OK.’
- In the succeeding screen choose the ‘Switch WL Direct.’ Now click ‘Done’ and then ‘OK.’
- The next step is to start your system and enable your ‘Canon TR4500 Wi-Fi’ setup.
- Choose the printing device that has the name ‘DIRECT.’
- When prompted, input the right credentials. If you encounter any problem in this process, contact Canon printer support.
The Process of Canon TR4500 Setup on Mac
You can also set up the TR4500 series printer on your Mac device. Adhere to the following steps for it.
- See if the ‘Default’ is chosen in the dialog that is displayed.
- Choose your printer.
- From the tab of ‘Use’, choose ‘Secure AirPrint.’
- Tap ‘Add.’ You have successfully accomplished Canon TR4500 Setup Mac.
What to Do When Your Canon Printer Doesn’t Print
You can check numerous things when you face the problem of Canon TR4500 not printing. They are listed below.
- Ensure that your printer is plugged securely in. After that, press the ‘ON’
- Ensure that your printer is securely connected to the computer. If you utilize a USB cable, it should be firmly connected to the printer and your PC.
- Check whether the paper settings align well with the information set for the cassette. Otherwise, the error message will appear.
- Delete all the printing jobs that are stuck in your print queue.
- Check whether you are using the right printer driver. A driver for another computer might not work in this case.
READ MORE- Quick Fixes For Canon Printer Error 6000- Complete Guide
Final Words
The Canon TR4500 setup process will not seem difficult or complicated to you after reading this article. You can set the printer through the USB port or set it up wirelessly. Carefully follow the instructions for both these procedures. You can also use the Wireless Direct option for connecting Canon TR4500 to your computer wirelessly. If you find that you simply cannot set up the printing device, seek expert Canon Printer support.