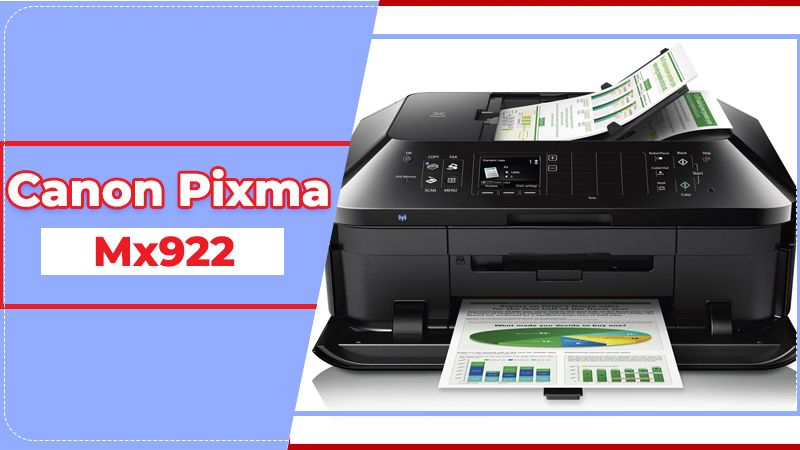
Canon Pixma Mx922 is an all-in-one inkjet printer that has the ability to print, scan, fax, and copy documents. Such a printer model has numerous astounding features including automatically print both sides of the pages. It is purposely designed to meet all your desired requirements. When you take this printer model first time at your home or office premises, you need to set it up. Once you are done with the setup process you can start using your printer to print anything. If you are a newbie, then get the quick and easy printer setup solutions over here.
Concurrent Guidelines For Canon Pixma Mx922 Setup
Canon Mx922 Printer Setup. Hence, let’s start setting up your printer hassle-freely using the below-noted guidance.
Canon Pixma Mx922 Printer Setup Hardware
Following are the suitable ways for the hardware setup of Canon Pixma Mx922 Printer:
- As soon as you purchase the Canon Pixma Mx922 printer, you need to unbox the printer.
- First, unpack the printing box and gently take out the printer.
- Place the printer at the surface table and then search for the power cable to get connected to the socket. Adjust it as required to get it connected without any hindrance.
- Now, you have to install the printer ink cartridges. To do this, grip the cartridge access door properly and insert it into the required place.
- Now, arrange the sheets of white plain A-4 sized paper and place it on the paper tray.
Once you are done with the above steps, start using the next guideline to end-up the printer setup process.
Manual Setup of Canon Mx922 Printer
Following are the steps that will help you to smoothly setup your Canon Pixma Mx922 Printer manually:
- First and foremost, press the “Menu” button on your printer.
- Select the “WLAN” setup icon (i.e. Wireless Local Area Network) using the navigation buttons.
- Afterward, click the “OK” tab.
- After doing so, a Wi-Fi connection has been successfully established on your printer. You will get to know about it after seeing the Wi-Fi lamp blinking in blue color.
How to Install Canon Mx922 Printer Setup Using WPS Method ?
Rather than setting up your Canon Mx922 Printer manually, you can use the WPS method for your printer setup. Here’s the step-by-step instruction you should go through to efficiently setup your printer. Let’s begin:
- First, on your printer display, press the WPS button and then hit the “OK” tab.
- Thereafter, go for the Push button and then click “OK”.
- Now, keep holding the WPS button that is placed on the Access point.
- Press the “OK” button on your printer within a couple of minutes.
- At the end, click the “Copy” tab as when the screen on the right appears.
- Now, you have finally connected your printer.
Wireless Setup of Canon Pixma Mx922 Printer on Windows
Once your Canon Pixma Mx922 printer is successfully connected, let’s configure it on your Windows PC. Here’s how to setup wireless printer on Windows:
- Firstly, turn on your Canon Pixma Mx922 Printer, Windows PC, and your Wi-Fi Router
- Now, in the next step, try connecting your printer with the wireless network.
- For connection, you first have to download the driver directly from the official site canon.com/ijsetup.
- Once the printer driver downloads completely, follow the onscreen instruction to install the printer driver software.
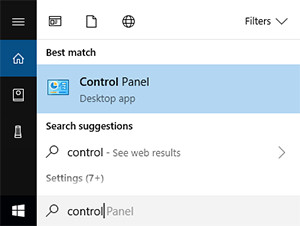
- Afterward, go to the “Start” menu on your Windows Desktop.
- Next, open the “Control Panel” tab.
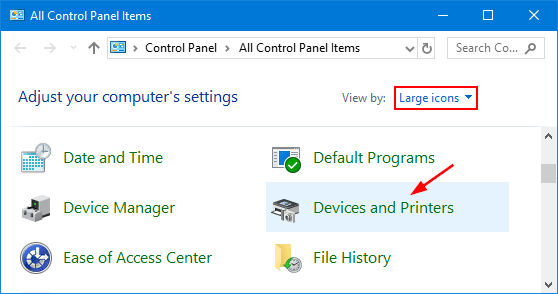
- Click on the “Devices and Printers” option.
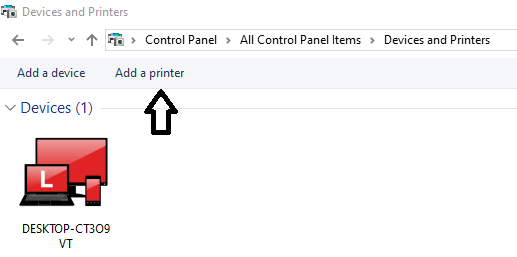
- Choose the “Add a printer” option.
- Now, opt for your network printer from the provided list.
- Your Canon Wireless Pixma Mx922printer will be connected to a Windows PC in a while.
Canon Pixma Mx922 Printer Wired Setup on Windows
To setup Canon Pixma Mx922 Printer using USB or wired on Windows, follow the below-noted steps:
- First, ensure that your printer and Windows PC are turned on.
- Now, connect Printer and Windows PC via USB Cable.
- Then, access the canon.com/ijsetup link to download and install the correct printer driver.
- Thereafter, open “Control Panel” from the windows search bar.
- Afterward, select your printer by clicking on the “Add a printer” option.
- Choose your printer from the appeared printer list.
- After a few seconds, your printer will be added to your computer system.
This is it! Your printer has been configured properly on your PC. Get a Canon Pixma MX922 Troubleshooting guide from our technical team if you face any issues while setting up your printer.
How to Configure Canon PIXMA Mx922 Wireless Setup On Mac ?
To complete the Canon Mx922 Wireless Setup Mac process in a handy manner, follow the given instructions:
- First, make sure that your printer, Wi-Fi router, and Mac are turned on.
- Then, connect your printer with a Wi-Fi router.
- Now, download and install the Canon printer driver on MacOS via canon.com/ijsetup.
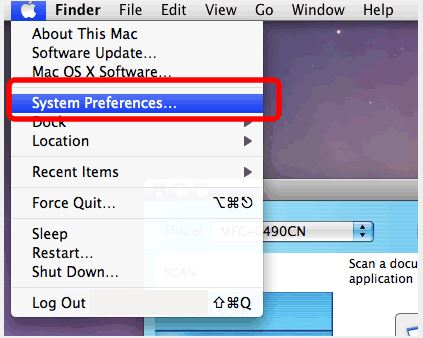
- Now, in the next step, give a single click on the “Apple” menu.
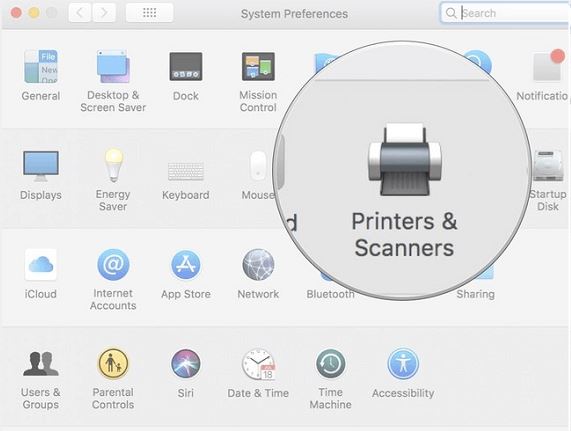
- Navigate System and preference > printer and scanner.
- Click on the “+” Add sign from the bottom left side.
- Then, choose your printer from the opened list of printers.
- Keep following the onscreen course of actions till the end to successfully setup the printer on Mac.
Now, your Canon Pixma MX922 printer is all set to serve quality printouts. Receive the printed pages right now right here.
Wasn’t It Helpful? Call Us At The 24/7 Helpline Number
If you are still unable to setup your Canon Pixma MX922 printer, then don’t freak out! We are talented tech-specialists who will definitely provide you fruitful directives. Contact us via dialing the printer helpline number and share your problems. We will assist you to instantly eradicate your error issues.